

Our Glasgow flat has been coming on quite well, with the bigger projects getting wound up - and we're now on to the smaller ones! This indoor hanging plant rail is a little project I've been wanting to do for a while and we've been doing in the background and evenings around the other ones.
Now that we have finished the hanging plant rail in the kitchen I thought I could share the process (super easy and not that unexpected) but also the links for what we used. I'm hoping that will be more useful as I'm already getting DMs on instagram about supplies due to a picture getting shared!
DIY Supplies
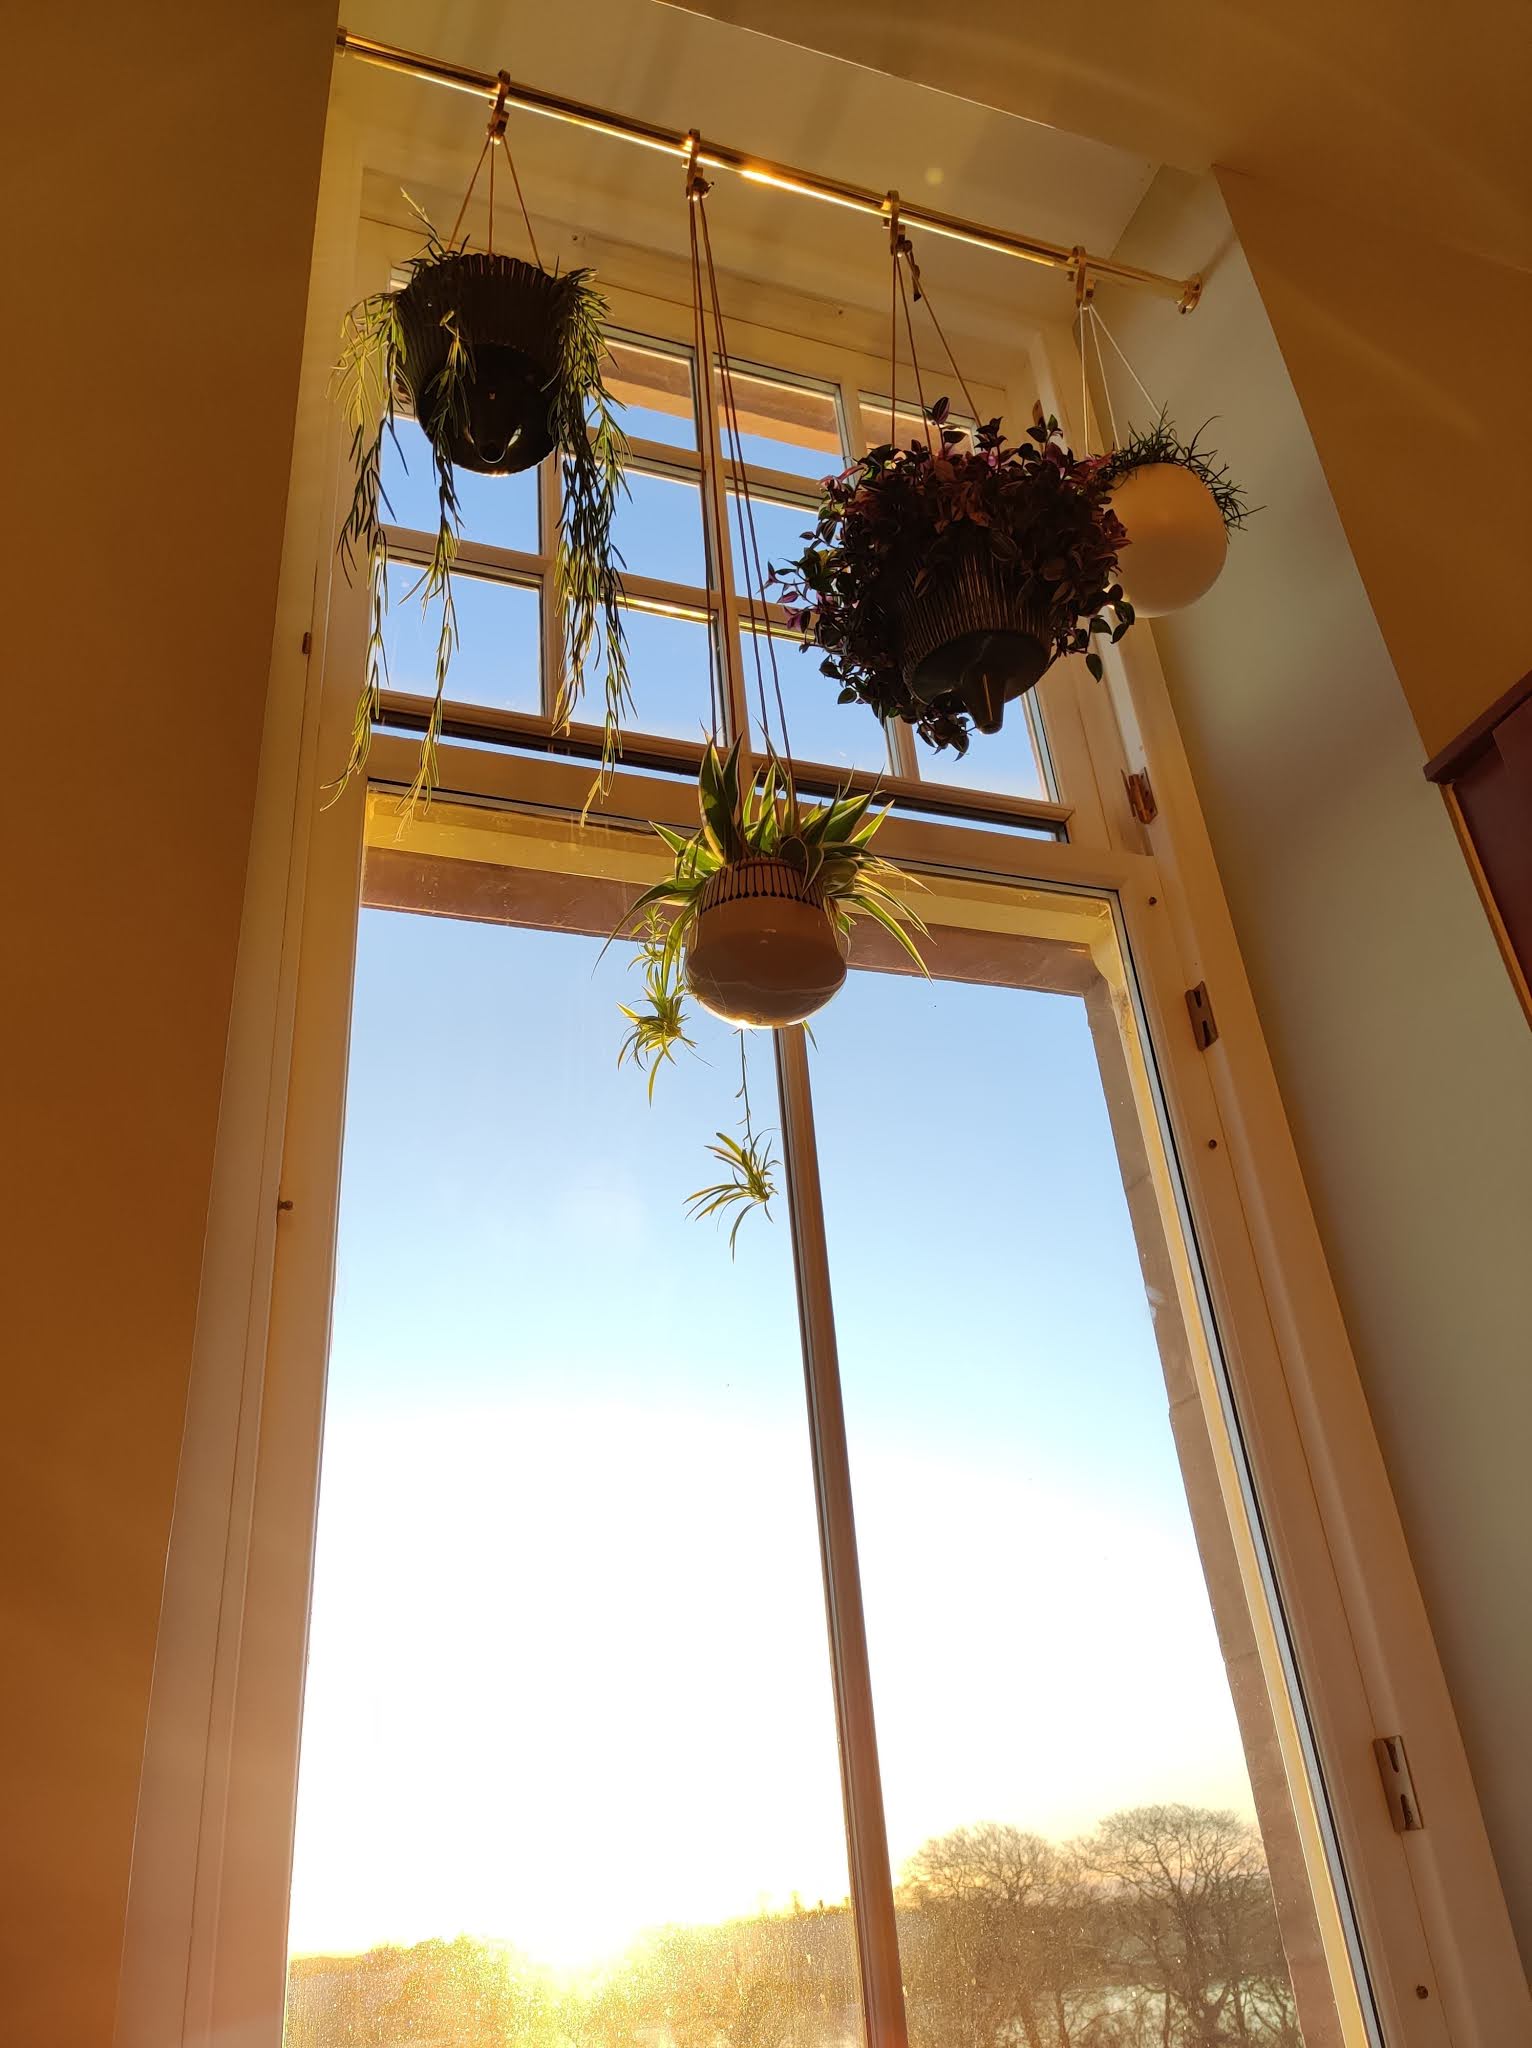
We decided to go for a brass look, so we got this polished brass tube. We decided to go for a heavy duty tube to be sure it could hold the weight.
The wee thingy to attach the tube in the window recess was a little harder to track down, but we used this as we didn't want to interfere with the sash window frame or bring the rail outside of the window.
Process
To prep we needed to cut the brass tube to size, which once we had the measurement we used a regular hack saw. In order for the saw to get a grip on the tube we covered the area with masking tape. Then finished it off the newly cut end with some sandpaper.

The end socket was the life saver here, it only takes 3 wee screws to attach it to the wall and then it was flush to the wall!
Because we were going for a flush finish it was important to attach one end socket to the wall, then inserting the tube into it and then attaching the other socket with the tube already inside of it.
That can be a little awkward and was a 2-man job - I had to hold the tubes up and keep it straight while Matt screwed the other end socket it.
And that's it, like I said pretty simple! What was trickier for us was the height of the windows so we used our indoor scaffolding to get up there.
Plants and Accessories
Then came the fun part - accessorising!
Because I'm extra I wanted matching brass hooks for the rail - I found these cute S-hooks which were flat rather than round (they also have them in black). This means they don't move once they are hooked on.
From right to left we have chosen these plants, and tried to suit the environment of direct light in the mornings and quite a bit of humidity because it's a kitchen:
- This bargain from B&Q, a mistletoe cactus in a hanging pot (affiliate link)
- The green pots are these beauties (affiliate link), a little expensive and we only meant to order one of them but it came cracked in a couple of pieces. But I hope I've managed to salvage it with a lot of industrial strength glue and some creativity. They company were quick to replace it, which was great and I hope my repair job holds out.
- The purple and green cutie is this, delivery was great
- Then the lowest plant pot is a little handmade ceramic pot with a spider plant from B&Q in it. I've had the plant for a while now, it was living in my bedroom and it seems to go through peaks and troughs. It goes from looking half dead and then a new baby-plant appears!
- The final, big trailing beauty is actually this plant (which is surprisingly tiny in the pot but looks great when arranged and can reach 1m in length)
To customise the length of the plants we removed all of the strings and replaced them with para-cord in beige (we got a few metres from eBay).
If you have any questions on this, or if you have done this DIY please let me know and I would love to see photos!


Comments
Post a Comment
Thanks for taking the time to comment, I read every one!